SHOP TALK & A LITTLE ENCOURAGEMENT

So let’s talk shop for a minute.

If you’ve read the few blog posts I’ve had over the years, you will quickly notice the shift that has occurred. I began this blog with a passion for DIY. Not the crafty DIY, but the get your hands dirty, pull out the sander and paint cans kind of DIY. I loved scouring the flea markets and junk shops, repurposing furniture, and breathing new life into old pieces. And I had an Etsy shop full of these finds. But as business picked up, passion began to wane. With my lack of photography skills, photographing and editing the product became overwhelming, packaging and shipping the product became a job in itself, and storing the product became too costly. As a one-man show, I simply couldn’t keep up with it all. So I decided to shut down my Etsy shop and go local. I found a space at an antique shop and with a thousand ideas in my head, dove into my niche.

And heck, it was fun! I loved the satisfaction of knowing that something I created, something that I designed and painted with my own hands (and sometimes blood, sweat, and tears…) was getting used and loved and cherished on a daily basis. That’s an awesome feeling guys.

However, when I got pregnant, working with paints and stains and spirits somehow became a little less appealing. So after about 9 months of sales, I closed up shop once again and hunkered down with baby. Over the next year, I would still collect ideas and work on products, but what I found myself more and more drawn to was the design rather than the process. I loved imagining the end product. I loved picturing it in a home, and then I would imagine how I would decorate around it.

I always loved decorating. Even as a little girl, I would spend hours styling and restyling a single bookshelf. When I purchased my first home, it became my canvas (and half of my product went into my home instead of my shop. Not usually the best way to run a business…) and as friends and family came through, I began to build a reputation. They would come to me for advice, ask me to decorate a room, and ever so slowly I realized this is it. This is what I want to do. I want to help people live in a more comfortable and happy environment.
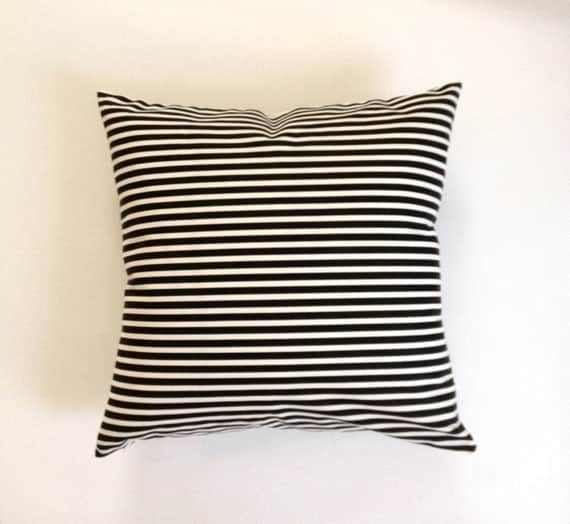
FB_IMG_1461165067999-01 (1)

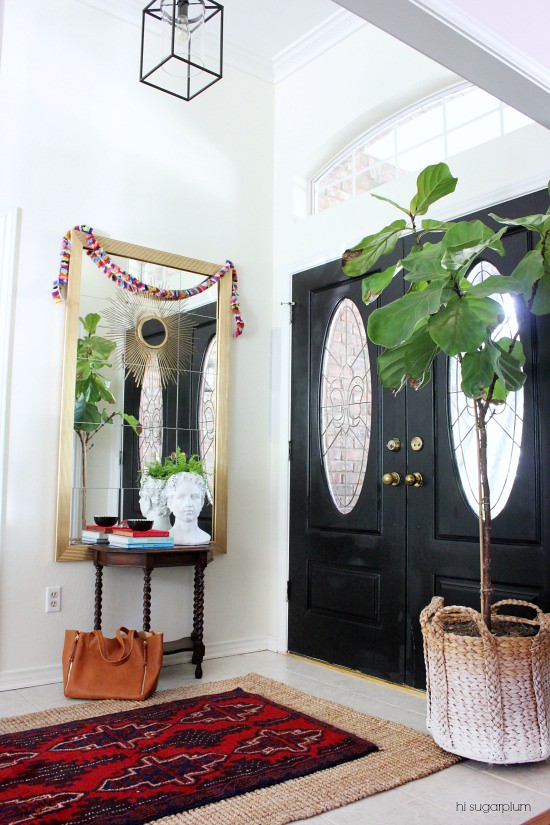
A little piece of my own happy environment!

So again, with a dream and a more intentional goal, I took the plunge and opened up my eDesign shop.

I didn’t really know what to expect. I expected very little actually, but it just felt right, and I got my first client within the month. Things took off from there. With each new client and each new room, I gained more confidence, but with no formal training, I still had that doubt in my head – who do you think you are? Do you really think you can get away with playing the decorator?

It wasn’t until I went to sell my home that I gained that boost I really needed. Within the week, without going on the market, the house sold. The agents involved spoke highly of the décor and I finally felt like it was time to give myself a little pat on the back. It felt good. And it gave me the courage to market myself locally. Which is how I now find myself designing a spa.

Halo Salt Spa 1

Halo Salt Spa 2

And a sneak peak into my most recent project…

I say all of this to you 1.) to inform you in a very long and round-about way that going forward, this blog is going to focus much more on design than DIY (although there will be DIY thrown in there!), and 2.) to give YOU the confidence and the encouragement to find your passion and follow your own dream. Taking the plunge doesn’t have to be all or nothing, but it can be the stepping stone that leads to bigger and bigger things. I’m standing on that stepping stone as we speak (and frankly, it scares the hell out of me) and while I will probably wobble a bit and take my time moving on to the next one, I can see the outline of it ahead of me, and that is pretty amazing. So be scared, my friends, but do make that jump onto the first stone. And feel free to follow along as I embark on my own wobbly path!

CREATING A FUN (AND FUNCTIONAL!) ENTRYWAY

Well, I most definitely have not been a good blogger…but I have been a good designer! I’ve pulled in my first e-design clients ya’ll, and so far it’s been so much fun and quite a success. It began as a small project – a 6×6 project, to be exact. I was asked to liven up a very empty entryway into a semi-open concept, California home. After reading through the client’s completed questionnaire, I quickly realized how well-matched our vision and design style was. I probably couldn’t have hand-picked better clients myself! So I hit the ground running, full of ideas and excitement.

Entryways can be a little tricky though, for two reasons: 1. they’re kind of like the windows to the soul. It’s that important first impression – you want to let your personality shine, but you don’t want to tell your entire life story in one breath (entire life story = way too much clutter for a miniscule space!), and 2. storage. Yep, kind of boring, but totally necessary. You have to make your entryway functional. As much as you may want a pristine cowhide rug, a marbled console, and an oversized vase filled with cherry blossoms, that just ain’t gonna work if you have two dogs, a kid, and a husband that doesn’t understand the concept of style.

So you have to start with the basics. Review your lifestyle and the ensuing wear and tear your entryway will receive, and go from there. If you throw off your shoes the moment you walk into the house, designate a space for said shoes, and a small bench or stool to put them back on as you leave. If you’re always giving yourself a final onceover before heading out the door, hang a mirror above a console and gather a few lip glosses in a decorative bowl to have at the ready. If you have a big family, a lot of coats, and very little closet space, you just may want to throw in a coat rack and a few organizational, catch-all pieces. Catch my drift? Once you have your basics covered, you can start piecing in the fun, quirky stuff.

Hi Sugarplum | Layers of an Entrance Hall

(Over-sized mirror + console with catch-all bowl + personal touches and greenery = quirky elegance via Hi Sugarplum)

Loft Living Room Makeover vintagerevivals.com-23

(Customized vintage storage + family organization + major greenery and quirky pendant light = major “modage” boho via Vintage Revivals)

So that’s what we did. They knew they wanted some kind of streamlined, modern storage. They have one, well-behaved dog so they knew they needed a place to hang the leash, and they knew they wanted a catch-all basket and some greenery. With that in mind, I pulled together this initial draft moodboard to make sure we were on the same page…

eDesign: Entryway Moodboard

Simple, yet colorful and eclectic. The dash wallpaper you see above is actually a light, cotton fabric that will be applied to the ceiling (the rest of the walls will be white). On a side note, I’m omitting the full design concept / layout to give my clients a little privacy, but luckily they loved  it! They were a little unsure about the semi-floating shelf, however, so I went with a variation on the design to give them a new perspective:

E Striebel Draft #2 Moodboard

Not a huge difference, eh? I swapped the hanging drawers with some floating, open shelving – perfect for draping some greenery! – but in order to better balance the open shelving, I went with a simple, DIY coat rack on the opposite wall for small accessories (totes, hats, scarves, leashes…).

In the end, we went with a lovely, modern floating console (just fyi: in the design layout, decorative hooks are included for the leash and other small accessories!) and I, and more importantly, my clients couldn’t be happier! Here is the final product board…

E Striebel Final Product Mood Board

Not too busy but still functional, fun, and full of personality! What do you think? Would you have gone with the floating console or the aluminum open shelving (totally a personal preference – I love both options, obviously)?

Like I said, I really think I got the Golden Goose of a first client, and I’m looking forward to future design projects. With our styles and communication so aligned, next in line will be their great room, dining room, and kitchen – so stay tuned!

If you’re interested in my e-design services, feel free to head on over to my shop on Etsy or just shoot me a message and I’ll be happy to help you as best I can!

LOFT LIVING: A NEW eDESIGN

Phew! That last post was a bit of a doozey so I’m going to keep it simple this time around.

I’m pretty sure I’ve mentioned my slight obsession with Mandi over at Vintage Revivals. A genius that woman is! Most recently, she morphed what was already a pretty awesome space into something TOTALLY different. I mean, it doesn’t even look like the same space, right?

Living Room Makeover @ Vintage Revivals-2-2

Loft Living Room Makeover vintagerevivals.com

I actually love living in the country (I actually live near downtown Charlottesville, but coming from DC, it feels like the country!), but oh how I long for that urban getaway! Feeling a bit inspired by Mandi’s glorious transformation, and after daydreaming for longer than I care to admit, I decided to create a new Loft Living eDesign…
Loft Living
  1.  Leather sofa – I love how it’s already distressed, but it’s a bit pricey – HERE is a cheaper option that I have no doubt your butt will naturally distress!
  2. Balloons over Manhattan – This photo is fantastic and it adds a little color and whimsy to the space. I would suggest ordering the largest size possible, or requesting a custom size.
  3. Wool rug – I think this rug is beautiful and absolutely perfect for the space…if you have the cash to spare. BUT, very unfortunately, most of us don’t so you can find some cheaper options HERE and HERE.
  4. Rattan chairs – LOVE these chairs. They are so simple yet so versatile and stylish.
  5. Arm chair – Gotta love Jonathan Adler!
  6. Leather pouf – some cheaper options HERE, HERE, and HERE
  7. Side table – Currently unavailable, but THIS is a good option. Or THIS.
  8. Coffee table – Threshold is killing it these days!
  9. Lateral file cabinet – A dual-purpose piece is always a YES in my book, particularly for small-space living. This streamlined filing system can serve as a console table while keeping all the paper clutter at bay!
  10. Herb pot / Cactus garden / Ceramic hedgehog planter / Himmeli hanging planter – A little dose of happiness. There is nothing like plant life to make a space feel more alive.
  11. Trio pendant lighting – the naked bulbs keeps the space open and airy while still providing enough light.
  12. Tripod floor lamp – sold out at Ethan Allen, but here are a few more options: 1, 2, 3, 4
  13. Bookcase – This provides the necessary shelving without looking too heavy. It also adds another dose of whimsy.
  14. Throw pillows – no longer available, but here are a couple of pairings: 1/2, 1/2, 1/2
  15. Faux brick wallpaper – The character that brick can add to a space is second to none and, if done in moderation, instantly reads “loft.” I’m partial to the whitewash, but the distressed red can work just as well!

Are you daydreaming yet?

If you would like to see more of my eDesigns, please head on over to my Etsy shop!

Incorporating the Modern…A Wishful Room Update.

There’s something about colder, crisper weather that makes me want to redecorate my entire house. Add to that my nesting instinct and it’s a recipe for trouble!

Of course, with a baby on the way, my decorating budget has dramatically decreased. And I’m pretty certain once my little one is in my arms I won’t give a second thought to what my house looks like for at least the first month, but in the meantime, a girl can dream, right?

Living Room 2013_edited-1 copy

Living Room Mantle 2013_edited-1

Yep. There’s baby stuff around the house now!

When I moved into this home 2 years ago, I had a bit of an infatuation with Pottery Barn. Who doesn’t? But since then, my style has morphed a bit and I would love to incorporate a few modern touches. My new infatuation? Black and white!

However, I wasn’t sure how to incorporate this new infatuation with my much more rustic décor without spending an arm and a leg…until I realized that the answer was right under my feet!

Living Room & Hallway_edited-1

Since my floors are a lovely, distressed black and white, I figured that I could easily (and cheaply!) tie this into the décor with a few fun throw pillows and blankets without things looking too hodge podge. So I turned to Etsy and Zara Home for some inspiration…

Neon Plus Cross Throw Pillow Cover By Pencil Me In // Mint, Lime Green, Hot PinkBlack and White Triangle Throw Pillow By Pencil Me In // Black and White Pillow18x18 Decorative Throw Pillow Black and White Striped Medium Weight CottonTriangles pillow decorative throw pillow geometric pillow cover white cotton toss arrow pillow case rustic bedding set 18x18 inches ohtteam

Decorative Pillow Cover - 18 x 18 Yellow Black White Chevron Zig Zag  Designer Pillow Cover - Throw Pillow

Let me explain…the throw blanket and pillow with yellow detail you see directly above would go on the armchair and incorporate the few pops of yellow that I already have around the room. And the remaining pillows would get arranged on the couch and would incorporate the teal-ish blue on the entertainment unit and game table/bistro chair.

I would also love to find or create a large piece of canvas art next to my fiddle leaf fig, and print out some fun artwork to replace in the two frames hung above the bench.

And voila! With very little effort I would have a completely new, modern vintage (“modage”) look. Now to replace the couch…

What do you think? Love it or hate it? Do you think the black & white clashes too much with the rug?

GIVEAWAY WINNER AND HURRICANE PREPARATION!

I hope everyone had a lovely weekend! I was in DC for the Marine Corp Marathon (not to run, I’m not quite as crazy as that!) to cheer on some friends – I’ll be sure to share pictures with you later. Incredibly, the weather actually held through the entirety of the marathon, but we are now bracing for the hurricane to hit. Luckily, Charlottesville is slightly on the outskirts of the worst of it, but even here, schools are shut down and public transit stalled. And just recently, we received a blizzard alert through 2PM tomorrow!

My husband and I have been running around finishing up a few errands before the potential loss of power, hence the delayed post today, but I know a few of you are anxious to hear the winner of the vintage sheet music giveaway!

Music Wreath Complete

Sheet music craft idea!

So, without further ado…the winners are (drumroll please…)

Beverly Meng

and

Laurie from House of 34.

(Ladies, please email me your home address and I will get your sheet music sent to you ASAP!)

Thank you all so much for participating! I will have another giveaway coming soon so please keep your eyes peeled.

And remember, I do have vintage sheet music and booklets available for purchase in my Etsy shop

11X14 Vintage Sheet Music - Collection of 35 Sheets

The Musical Quarterly (Set of 5: 1934 - 1942) & The Music Review Volume II (1941)

Antique Etude Magazines: 1908 - 1909 (Collection of 5) / Antique Sheet Music

Home Circle Music Series Set of 4 - No. 3, No. 24 (Vol. I), No. 25 (Vol. II), No. 39

DIY THURSDAY: SHEET MUSIC WREATH & A GIVEAWAY!

Don’t you just love Thursdays? With the holiday season quickly approaching (I can’t believe it’s already the end of October!), I thought I’d share with you a quick and easy project that just may help with your holiday décor…

I’m sure many of you have seen Miss Mustard Seed’s sheet music wreath:

When I first set my eyes on this adorable wreath, I fell a little bit in love, so I set out to make my own.

First, I loaded up my makeshift work station (aka my living room floor) with all the items I needed:

  1. A stack of vintage sheet  music (which I happen to have BOXES of…)
  2. A glue gun and glue
  3. Ribbon
  4. Scissors
  5. Pine cone (optional)

Really, that’s all it takes! Now, some of you may be wondering where in the world am I going to find vintage sheet music? To help you along with this little problem, I will be giving away TWO large stacks of vintage sheet music for TWO lucky readers! The how and the when is revealed at the end of this post, so read on my friends!

After I had all my supplies on hand, I began by folding and carefully ripping a few sheets into eighths (you’re welcome to use scissors, but I happen to like the distressed affect ripping gives). With a few more sheets I then did the same with fourths and then with halves.

Stages of Music Wreath

Once I had enough pages torn, I folded each set of eighths, fourths, halves, as well as full pages into cones, using the glue gun as needed.

Music Wreath Progress

I continued to fold these miscellaneous sized pages into cones until I had enough to my liking, and then the fun really began!

*Please note: if you happen to be doing this project on a surface you do not want to get glue all over, make sure you lay down a mat, newspaper, scrap piece of paper, what have you, BEFORE you get glue gun happy in order to protect said surface!

Per Miss Mustard Seed’s wreath, she may have begun by gluing her largest set of cones together into a circular shape to create a solid foundation, and then proceeded to layer each varying size set of cones over that to get the final product you see above. I, on the other hand, wanted to go for a slightly more disheveled look, and so began with the smallest set of cones, using a cut out circle as my backbone…

Music Wreath Progress 2

This is the backside of the wreath in progress (and I was actually working on newspaper, but moved the wreath to the carpet for picture purposes only!)

I then began vaguely layering each varying size of cones into the gaps, using plenty of glue in the process, until the wreath was to my liking. Once all the cones were in place, I glued a small pine cone into the center just for that little extra oomph, and glued ribbon onto the backside to hang. And the final product….

Music Wreath Complete

Viola!

I just love how it turned out! Of course, this wreath could stand on its own anytime of year, but with a little added garland, it would make the perfect holiday décor. You could also consider making miniature versions of this wreath as Christmas tree decorations, or to use as a bow for those special presents.

……………………………………………………………………………………………………………

Now on to the important part!

TWO lucky winners will receive a large stack of vintage sheet music for your crafting pleasure. All you have to do is follow me via Facebook, Twitter, or email (or all of the above), and leave a comment below each time you do so. I will select two winners at random.

This giveaway will close on 10/28/12 at 11:59 EST. Winners will be announced on Monday!

If the wreath wasn’t inspiration enough, here are just a few more things you can do with sheet music…

Pinned Image

Pinned Image

Pinned Image

If you weren’t one of the lucky winners, you can purchase stacks of sheet music from my shop Smile

LINKED TO:

Katie's Nesting Spotshabby creek cottageMade in a Day

MY ETSY SHOP IS BACK UP AND RUNNING!

Hello my dear friends. I know, I know, I’ve been absent for a few days – I managed to get myself distracted with a few projects around the house, and more importantly….MY ETSY SHOP!

Yep, my shop is back up and running, and while I only have a few items listed at the moment, I’ll be adding much more throughout the week. In the meantime, take a peek around and let me know what you think!

TGIF – enjoy your weekend!

A STUDIO, A SHED, & A SHAMELESS PLUG

When I first began writing this blog, just a few of months ago, I was on a desperate search for a studio, as you may have seen from this post. Not just any studio, mind you, but a space so full of vintage character and industrial charm that simply stepping foot into it would transform me into a state of inspired bliss.

And for a brief second, I actually thought I found it; obviously, the space was being used for storage, but try to imagine it as a blank canvas…

Scottsville Studio Space

Scottsville Studio Space 2Scottsville Studio Mantle

Scottsville Studio Street 2

(note the list of dates on the building – these are flood lines! The James River is just a block away…now with a well-built levy, of course.)

Oh, be still my heart! The distressed brick and original wood beamed ceiling (the track lighting is an added bonus!) makes my heart go pitter-patter. The only downfall: location, location, location! While located in the heart of Scottsville (about 20 minutes from Charlottesville), the heart of Scottsville consists of half a block of storefront…and nothing else. Beyond this is farmland, a few gas stations, and a dollar store.

Of course, despite this one, huge downfall, my heart was still set on this little building, but being a bit risk adverse, I decided to test the market with a 12×12 space at an antique mall down the road first. And for once, I can actually say that I made the smart move.

Yep, I sold next to nothing and my little dream of becoming a shop owner went straight to the gutter.

Now, I haven’t fully given up on this dream, but I have become slightly more realistic with it. Rather than jumping headfirst into the unknown, I’m taking baby steps. First things first: find a space to store my pieces!

I’m in the process of closing my little 12×12 nook in Scottsville, which means that all my vintage and furniture items will be finding their way back into my home…

…but have I mentioned to you the lack of storage space in my house? No attic, no basement, no garage, and a shed the size of a hobbit’s home (or a Mattie-Lu size pup…):

Shed

It’s cute (the shed and the pup) but the lawnmower and garden tools already fill the shed to the brim!

So, I’ve decided to build a new one. And amazingly, my husband actually agrees with me! We’ll be keeping the shed you see above – possibly converting a portion of it into a chicken coop (more on this later…) – and will build an additional studio shed in the far left corner of the yard. Here are just a few ideas…(click on the below pictures for link to original source)

Cottage Charm

Two-Story Studio

(I’d build a one level extension to this on the right side, but I love the idea of having a portion of the shed two levels to create a loft space feel.)

We are debating whether to go with the rustic vibe (my husband’s idea) similar to the shed we currently have, or the glam cottage style (my idea…). What do you think?

Lastly, when finished closing up Scottsville shop, I will be reopening my Etsy shop – this is where the shameless plug occurs. Please keep your eyes peeled for the Grand Reopening! Here are just a few items you will be able to find in my shop:

Drum Table Complete 2

Refinished drum table with matching parfait chairs.

Bookshelf 2

1965 military issued bookshelf (refinished) and misc. vintage items.

Chair

Refinished wicker-back French provincial chair.

Copper Pot Styled

Cute little copper pot!

Large Sheet Music Set Spread

Lots and lots of sheet music…

Turquoise Chair Profile

A chippy turquoise chair.

And much, much more. If you are interested in any of the items listed above, feel free to shoot me an email and we can make arrangements.

Cheers!

THE MAKINGS OF A BLOG

You may notice a slightly different look on my blog this morning, and for this I have Ms. Natasha from My Cute Lobster Designs to thank! (Thanks Tasha!)

I readily admit, when it comes to the blogging world, I am not the most tech savvy gal by any means (as mentioned here). Needless to say, I knew I had to hire a bit of help. But who? How in the world (wide web) was I possibly going to narrow down the thousands of tech savvy entrepreneurs out there to one, single person?! It seemed like a daunting task.

In my quest for The One, I came across a few viable options, but the cost for these was no less than an arm and a leg…and considering that I only wanted a few tweaks made to my blog, rather than a complete overhaul, I was really only willing to give up a leg.

In comes My Cute Lobster Designs. I stumbled upon this little shop via Etsy and immediately thought this could be it! The blog page examples seemed simple and sassy, classic with a punch, and easy to navigate – just what I needed.

Custom Blog Design - WordPress or Blogger/Blogspot - original, one-of-a-kindCustom Blog Design - WordPress or Blogger/Blogspot - original, one-of-a-kind

Custom Blog Design - WordPress or Blogger/Blogspot - original, one-of-a-kindBlogger Template Premade - Pink Champagne - 2 Column Layout for Blogger, Blogspot

And better yet, it didn’t even cost the leg I was willing to sacrifice! A quick note to Natasha sealed the deal. Since then, she has been such a joy to work with, and for a bargain of a price. She works incredibly diligently, responds quickly, is more than friendly and patient with those non-savvy techies out there (ahem…), and still manages to put out a good product in the end.

I’m sure I’ll have many more tweaks to make as my blog evolves, but it’s comforting to know that I’ve got a go to gal. So if you’re looking to start, tweak, or overhaul your blog (or Etsy shop, or Facebook page…), My Cute Lobster Designs should be your one stop shop!

I must also give thanks to Amber Mabe of A. Mabe Design for creating my logo:

https://ny-image2.etsy.com/000/0/10139282/icm_fullxfull.20624186_auqqjvivbb40sockggoc.jpg

What do you think? I’m getting my act together, slowly but surely (I’ll look professional one of these days!) And coming soon…my Etsy shop!

Have a wonderful weekend everyone!